








FIXED REDIRECT

SMALL PULLEY. CLEAR PATH.
Pull from the place your body works best.
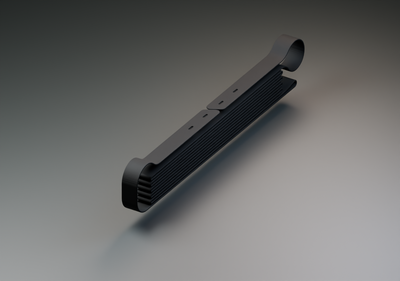
RPS redirects one flat LaserWeb path so the load and operator can remain on opposite working legs.
Choose components rated for your job. Working-load limits apply to the complete system; pulley ratios alone do not determine capacity.
YOUR PULLEY. YOUR MOUNT. YOUR SETUP.
Build the complete connection.
YOUR SELECTION / INTERACTIVE 3D
Loading the selected RolyPulley…
THE OPERATING END
Route with RolyPulley.
Control with Mounted CAM.
Bring the working end within reach. Pair your pulley with a Mounted Rolling CAM buckle, then choose the finish and mounting hardware that suit your space.
LASERWEB • CUT-TO-LENGTH WEBBING
Your color. Your length.
Ready at both ends.
Build the strap your setup needs. Choose your webbing, set the length, and add laser-cut slots to either end—or keep both ends clean.
LaserWeb360° view
Loading your roll…
Cut to your lengthNo excess to trim away.Choose each endSlots where you need them.Keep both ends handyMidpoint winding with WEBWINDER.
Which LaserWeb is right for my setup?
Start with a width that fits your hardware, then choose a material and color. Add slots only to the ends that need them. WEBWINDER is for storing spare webbing, not for carrying the load. Always follow the working-load limits of the complete strap and mounting system.
WHY FLAT WEBBING + A ROLLER
See the path. Keep it aligned. Control it from one reachable point.
01 / 1-INCH SYSTEMS
Start with the everyday strap size.
Our 1-inch pulleys and matching webbing make a compact starting point.


02 / 1.25-INCH SYSTEMS
Choose a wider strap when the layout calls for it.
The 1.25-inch family offers the same pulley choices in a wider webbing format.


03 / WEBBING + SERVICE PARTS
Control the strap. Replace the small parts.
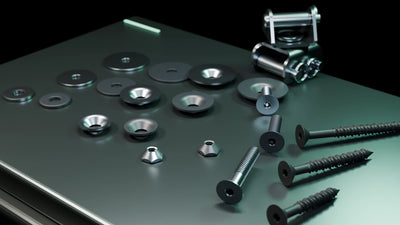
CAM buckles, WebWashers, WebCotters, rollers, pins, and rings stay with the strap path.


04 / FEATURED KIT / CHANGE DIRECTION
Two pulleys. One pivot point.
Join two compatible RolyPulleys back to back so each one can carry a different strap direction. The shared hardware stack lets the pair turn instead of forcing the webbing into one fixed angle.
- 01Face two compatible pulley bodies back to back.
- 02Join them with the low-profile five-piece hardware stack.
- 03Let the pair turn to follow the direction of the straps.
Shop the Swivel Kit
RAW + BLACK / 1 + 10 KIT PACKS


05 / CONTROL THE STRAP
Lock the strap where you want it.
The black CAM is the simple, hand-operated control point for a RolyPulley webbing path. Pull the flat strap through to adjust it, then let the roller and cam hold the position.
FAST HAND ADJUSTMENT
FLAT-WEBBING CONTROL
0.75 / 1 / 1.25 IN WIDTHS
SHOP BLACK CAM
 CAM / BLACK FINISH
06 / FINE-TUNE THE STRAP
Take up slack with one simple turn.
Swap a compatible roller for the WebCotter, pass the webbing through its center, and turn it with an Allen key. The strap winds around the pin so you can remove slack before the CAM holds it in place.
SEE THE STRAP TIGHTEN